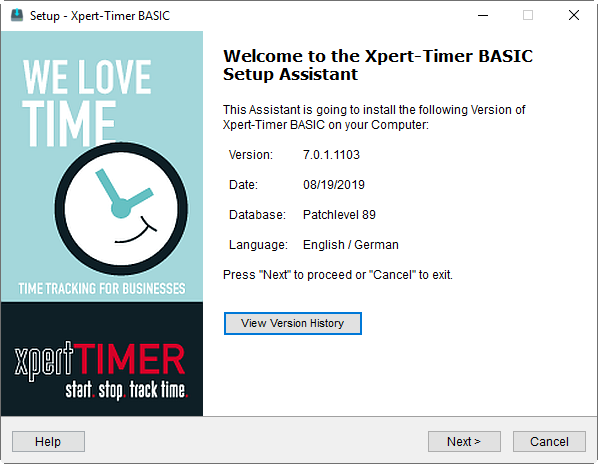
An installation wizard is available for your Xpert-Timer. You can decide, if you want to install the trial version, the full version or an update of your existing Xpert-Timer. Use the full version option if you own a license file and for example move from one computer to another.
Execute the file and for Xpert-Timer Basic XTInstBasicEN.exe
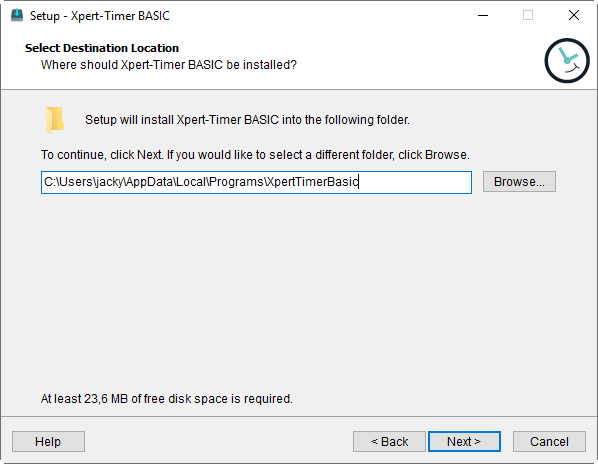
The wizard automatically checks, if there's an older version of Xpert-Timer installed on your system. The standard is set to install on your C://Programs(x86) directory. If you want to install Xpert-Timer in another directory, you can choose the directory accordingly.
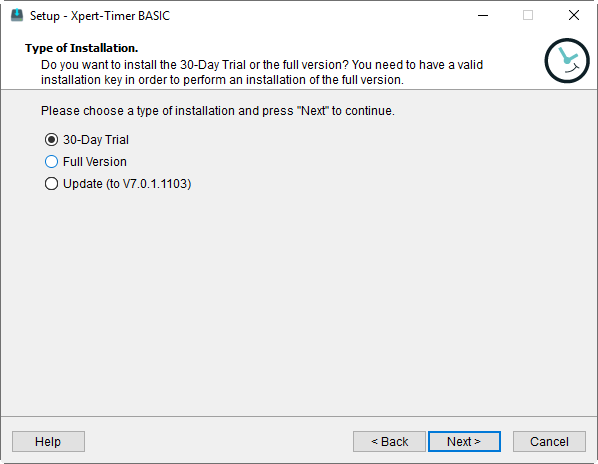
Choose your type of installation (30-Day Trial, Full Version, Update). If you've never installed Xpert-Timer on your system, choose the 30-day-Trial Version.
Go ahead and install the Full version if you own a license file and you needed to reinstall the program. This might be necessary if you switch to another computer, install a new operating system or similar.
If you've already got a version of Xpert-Timer installed, you can update it by simply choosing "Update". Xpert-Timer recognizes your installed version and updates automatically.
You can trial Xpert-Timer for 30 days. After those 30 days, you can continue using the data when you purchase a full license.
|
Xpert-Timer Basic is delivered with a SQLite database, but you can also choose to use the Access database. It will work, too. |
Enter the path where you want to save your Microsoft Access database. Make sure you have writing access to the directory, which is necessary using Windows 10.
You can fully test the Xpert-Timer for 30 days. After the expiry of the 30-day period, you can continue to use the data entered until then, if you decide to purchase the full version.
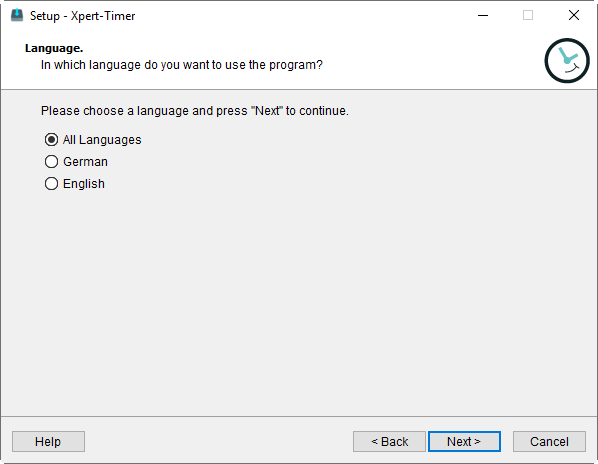
In the next step, you can choose the language of the program interface. In Xpert-Timer you can then select the appropriate language via the menu item "Program".
Xpert-Timer Basic comes as standard with a SQLite database. If required, you can also run the software with a Microsoft Access database. |
|---|
Language selection
Choose in which languages you would like to install the Xpert-Timer. The program provides you with a menu item for switching languages.
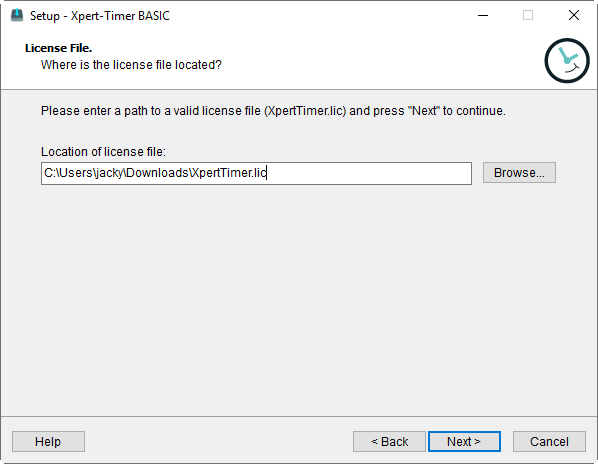
Path to the license file (When installing the "Full version")
If you install the full version of Xpert-Timer, you will be asked to enter the path to the license file. Hit Browse to find the file in your system and click Next. Please note, that you only need to activate the license file once, as the data is saved in your database. In a multi user environment you also only have to activate the license file once.
Select destination path
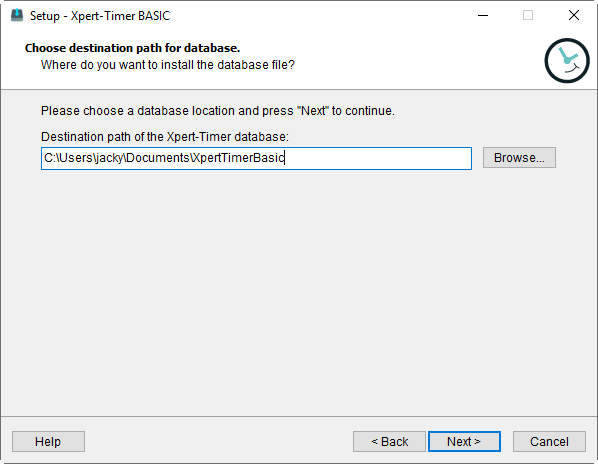
In the next step you specify the target path of the database. For SQLite, the database file is called: xt.sqlite and for Access: xt.mdb. Make sure you have full write permissions to the path. For example, with Windows 10, access to the Program Path is restricted.

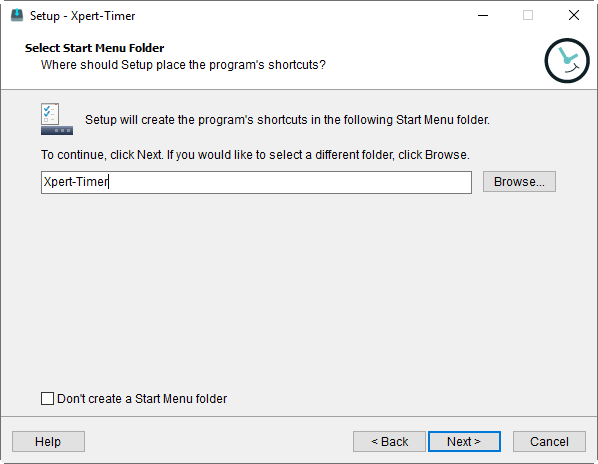
In the penultimate step, specify whether you want to have a shortcut to the Xpert-Timer in your Windows Start menu. We recommend this because it simplifies the launch of the program.
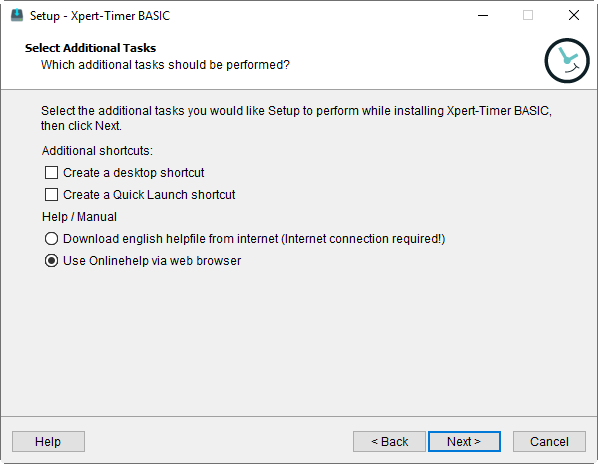
Now choose whether you also want to have a desktop icon and an icon in the Quick Launch bar. Again, we recommend doing so.
Our manual is available to you both in the online version on the Internet and in the offline version in the program. Decide which version you want to use.
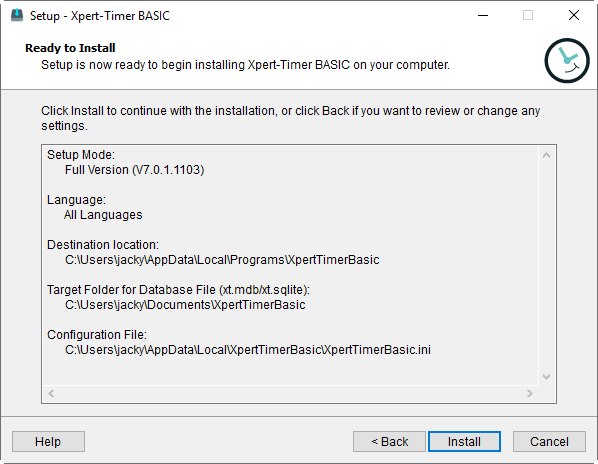
The overview shows you all the data you have specified. Click Install to install the Xpert-Timer on your system.
Now Xpert-Timer is installed and can automatically start up when finishing the setup.
|
Hint |
|---|---|
Make sure your read the chapter "Tips and tricks"! |
|